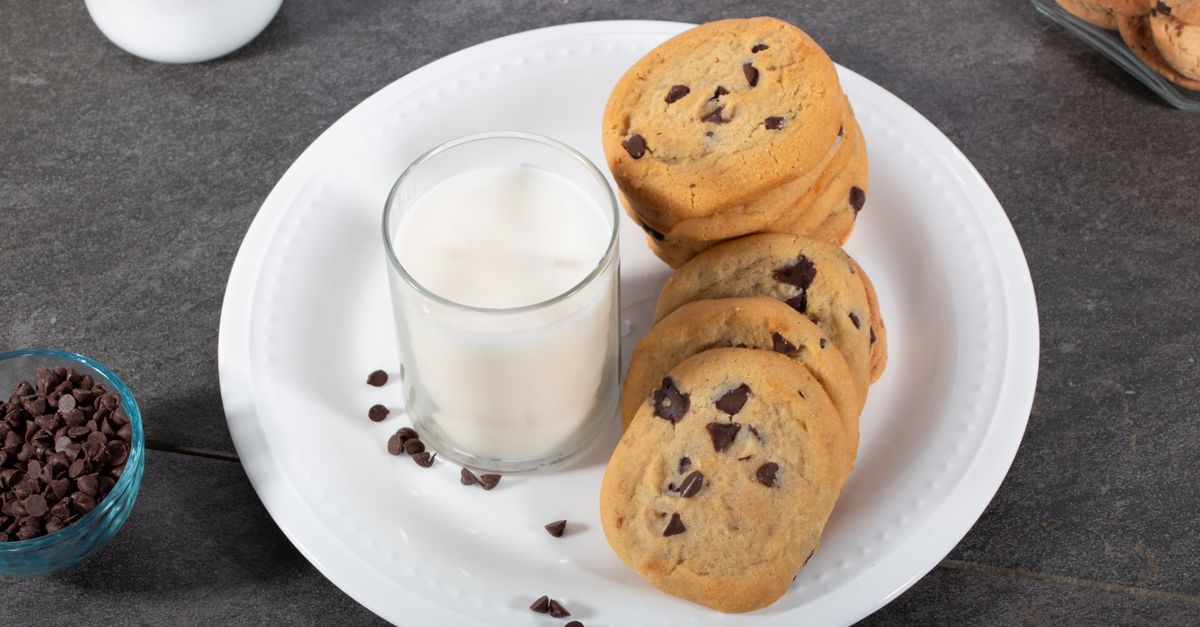
Why Your Homemade Cookies Are Flat (And The Simple Fixes That Guarantee Puffy Results Every Time)
Are you tired of painstakingly following a cookie recipe, only to pull a batch of sad, flat discs from the oven? It’s a common frustration, one I’ve battled many times in my own kitchen. You envision those perfectly plump, chewy cookies you see in bakeries or on Instagram, but yours consistently spread into thin, crispy wafers. It’s disheartening, especially when you’ve invested time, ingredients, and anticipation. I used to think it was just my oven, or maybe a curse on my baking skills. But after countless experiments, failed batches, and a deep dive into the science of baking, I discovered it’s almost never the recipe’s fault, and rarely yours. It’s usually a few easily overlooked, yet critical, factors that dictate how much your cookies spread.
What changed everything for me wasn’t a magic ingredient or a new technique, but understanding why cookies spread, and then systematically addressing the common culprits. Forget those vague tips about ‘chilling dough’ without understanding the science behind it. I’m going to share the specific, actionable shifts that will transform your cookie game from flat to fantastically fluffy, every single time.
Key Takeaways
- Ensure your butter is at a cool room temperature, not melted or greasy, for proper creaming and structure.
- Avoid overmixing dough after flour is added, as excess gluten development leads to tougher, flatter cookies.
- Chill your cookie dough for at least 30 minutes to solidify fats and prevent premature spreading.
- Use a baking scale for precise ingredient measurements, especially for flour and leavening agents.
The Butter Temperature Myth: Why ‘Room Temp’ is Often Wrong
When a recipe calls for ‘room temperature butter,’ most people visualize butter that’s soft enough to easily dent with a finger, perhaps even slightly greasy. The mistake I see most often is butter that’s too warm, verging on melted. This is a crucial misstep that directly impacts your cookies’ structure. Butter that is too soft or even slightly oily can’t hold air effectively when creamed with sugar. This initial creaming step is about incorporating air, creating tiny pockets that will expand during baking, giving your cookies their rise and tender crumb. If your butter is too warm, these air pockets collapse, leading to a dense mixture that spreads rapidly in the oven.
What actually works: Aim for butter that is cool room temperature. It should still be somewhat firm, but pliant. If you press it, your finger should make an indentation, but not sink through easily. This typically means butter that’s been out of the fridge for about 30-60 minutes, not several hours. If it’s too soft, pop it back in the fridge for 10-15 minutes. This seemingly small detail made the single biggest difference in achieving consistently puffy cookies in my kitchen. It allows the butter to effectively trap air, creating a stable emulsion that supports the dough as it bakes.
Over-Creaming and Overmixing: The Hidden Gluten Trap
Many bakers believe that longer creaming equals fluffier cookies. While initial creaming of butter and sugar is vital for incorporating air, there’s a point of diminishing returns, and even detriment, especially once the dry ingredients are introduced. Over-creaming butter and sugar can introduce too much air, leading to a fragile structure that collapses too readily. More importantly, overmixing once the flour is added is a primary culprit for flat, tough cookies. Flour contains gluten, a protein that develops elasticity when mixed with liquid. The more you mix, the more gluten develops, making your dough stretchy. A stretchy dough spreads out rather than holding its shape.
What actually works: Cream butter and sugar until it’s light and fluffy, usually 2-3 minutes on medium speed – no more. Once you add the flour, mix just until combined. This often means mixing on low speed for 30-60 seconds, or even finishing the last few stirs by hand. The dough shouldn’t look perfectly smooth; a few streaks of flour are perfectly fine. This minimal mixing prevents over-development of gluten, allowing the cookies to retain a tender, puffy structure. Think of it as a delicate balance: enough mixing to hydrate the flour, but not so much that you activate the gluten’s spreading powers.
The Leavening Agent Lag: Expired Ingredients and Incorrect Ratios
Baking soda and baking powder are the unsung heroes of cookie puffiness. They produce carbon dioxide gas, which creates those lovely internal bubbles that give cookies their rise. However, these agents lose their potency over time. An open container of baking powder sitting in your pantry for two years is likely inert. Similarly, using the wrong ratio, or simply not enough, will lead to flat cookies because there’s nothing to give them that lift. Additionally, some recipes call for one over the other based on the acidity of other ingredients; getting this wrong can also impact the chemical reaction needed for rise.
What actually works: Always check the freshness of your leavening agents. To test baking soda, mix 1/4 teaspoon with 2 tablespoons of vinegar; it should bubble vigorously. For baking powder, mix 1/4 teaspoon with 2 tablespoons of hot water; it should also bubble. If not, toss it and buy new. When it comes to ratios, precision is key. And speaking of precision, this brings me to my next point: a kitchen scale. Relying on volumetric measurements (cups) for flour and leavening is notoriously inaccurate. A cup of flour can weigh anywhere from 4 to 6 ounces depending on how it’s scooped. This variability can drastically throw off your wet-to-dry ingredient balance, leading to a dough that’s either too wet (spreads) or too dry (crumbly and still spreads due to lack of structure).
The Unchilled Dough Fiasco: Why Cold is Your Cookie’s Best Friend
Skipping the chilling step is perhaps the most common mistake home bakers make, often out of impatience. When you’ve gone through the effort of mixing your dough, waiting another 30 minutes, or even an hour, feels like an eternity. However, chilling your dough is a non-negotiable step for truly puffy cookies. It does two critical things: first, it solidifies the butter. Cold butter melts more slowly in the oven, allowing the cookie to set and rise before it spreads out. Second, it gives the flour time to fully hydrate, leading to a more consistent texture and flavor. Warm dough, with its soft butter, will immediately melt and spread when it hits the hot baking sheet.
What actually works: After mixing, cover your cookie dough and refrigerate it for at least 30 minutes. For even better results, chill it for an hour, or even overnight. This gives the butter a chance to firm up and the dry ingredients to fully absorb moisture, creating a more stable dough that will hold its shape better during baking. I’ve found that even a quick 15-minute chill makes a noticeable difference, but for truly thick, chewy cookies, longer is better. This step alone has saved more batches of cookies for me than any other tip combined. Your patience will be rewarded with a superior cookie that holds its shape beautifully and bakes up with a delightful chew.
The Over-Greased Pan Pitfall: A Slippery Slope to Flatness
Many bakers automatically grease their baking sheets, a habit carried over from cake or brownie baking. However, for most cookies, a heavily greased pan is counterproductive and actually encourages spreading. Grease creates a slippery surface, making it easier for the cookie dough to spread out rather than hold its shape. While some recipes call for a lightly greased pan, many do not need it, especially if you’re using parchment paper or silicone baking mats.
What actually works: For almost all cookie recipes, use parchment paper or a silicone baking mat. These provide a non-stick surface without adding extra grease, which helps the cookies adhere slightly to the surface and maintain their shape as they bake. If you absolutely must grease your pan (for instance, if a recipe specifically calls for it and you don’t have parchment), use a very light coating of a neutral oil or non-stick spray, and wipe off any excess. My personal preference is always parchment paper – it makes cleanup a breeze and consistently yields better-shaped cookies.
Frequently Asked Questions
Q: Can I use softened butter that’s been in the microwave?
A: No, absolutely not. Microwaved butter often has hot spots and starts to melt, even if it looks soft. This destroys the emulsion needed for proper creaming. If your butter is too cold, cut it into smaller pieces and let it sit at cool room temperature. Resist the microwave entirely for butter intended for creaming.
Q: My recipe calls for melted butter. Will my cookies still be flat?
A: If a recipe specifically calls for melted butter, it’s usually designed for a chewier, flatter cookie (think certain types of brownies or thin lace cookies). In these cases, the flat spread is intentional. However, if you’re aiming for puffiness, stick to recipes that use creamed, cool room-temperature butter.
Q: Does the type of flour affect cookie spread?
A: Yes, it can. All-purpose flour is standard, but using low-protein cake flour can lead to more delicate cookies that might spread slightly more. High-protein bread flour will develop more gluten, leading to chewier, sometimes flatter, results if overmixed. Stick to the flour type specified in the recipe for best results.
Q: My cookies are still flat even after chilling the dough. What else could it be?
A: Beyond butter temperature and overmixing, consider your oven temperature. An oven that runs too cool will cause cookies to spread excessively before setting. Invest in an inexpensive oven thermometer to verify accuracy. Also, check your baking soda/powder freshness and consider if you’re using too little flour (or too much wet ingredient).
Q: How long should I chill my cookie dough?
A: A minimum of 30 minutes is usually sufficient to firm up the butter and hydrate the flour. For optimal results, especially for recipes aiming for very thick, chewy cookies, 1-2 hours, or even overnight, is ideal. Longer chilling can also deepen the flavor of the dough.
Achieving perfectly puffy cookies isn’t a dark art; it’s a science of understanding ingredients and technique. By focusing on butter temperature, avoiding overmixing, ensuring fresh leavening, chilling your dough diligently, and using the right pan prep, you’ll eliminate the common culprits of flat cookies. My kitchen, once a graveyard of thin, crispy disappointments, now regularly churns out bakery-worthy treats. Embrace these simple shifts, and you’ll find yourself pulling out batches of plump, delicious cookies that will make you wonder why you ever struggled. Happy baking!
Written by Sarah Ellison
Home efficiency, decluttering, and mindful living
A former lifestyle editor with a keen eye for practical home solutions and personal organization.
You Might Also Like
Why Your Car Stereo Has No Bass (And What Actually Works for Deep, Punchy Sound)
Struggling with weak car stereo bass? Discover the hidden reasons behind poor low-end sound and what actually works for deep, punchy audio.

Why Your Homemade Pizza Crust is Soggy (And The Pro Secrets for Pizzeria-Quality Crisp)
Stop soggy pizza! Learn the overlooked techniques from a pro to achieve a truly crispy, pizzeria-quality crust at home every time.
Why Your Homemade Pizza Crust is Soggy (And The Pro Secrets for Pizzeria-Quality Crisp)
Tired of soggy homemade pizza? Discover the overlooked mistakes that lead to a limp crust and the pro tips for a crispy, flavorful base.